Automated SSL certificate management for private containers
Lately, I have been playing with many tools and as one gets into deploying those tools, SSL comes as a pain point. A large number of web-based tools I use are internal and on a private network. VPN (with OSPF running over FRR) takes care of connectivity but still, it’s good to have SSL on these machines. Non-HTTPs websites are getting more & more ugly with browsers and even things like password managers do not fill the passwords anymore on their own for non-HTTPS websites.
Possible ways to get SSL certificate for these private web applications:
-
Expose TCP port 80/443 for few seconds to get SSL cert issued from Letsencrypt. Works but too risky & is practical only with IPv6 as each container cannot have it’s own IPv4. Moreover, the IPv6 AAAA record keeps the container exposed all the time. Can be done behind a firewall but not clean.
-
Use DNS based validation via Certbot’s DNS plugins. Quite powerful once implemented and depending on implementation, does not add any major thread vector. This does need an authoritative DNS setup which supports API access or some workarounds.
DNS Setup to make it work…
Presently my domain “anuragbhatia.com” uses Google’s authoritative DNS. The reason why Google is simply because authoritative DNS hosting comes free with domain and hence I don’t see a reason to pay $3-$6 a year or any other authoritative DNS host. I can run own authoritative DNS but just avoid that since in past website has faced multiple DoS and DDoS attacks on web server & there’s always a risk of attacker attacking a bunch of DNS servers unless I do it at scale (5 servers with each on 10Gbps uplink and some DDoS filtering etc). That clearly is not worth it. :)
Now Google Cloud DNS does has API but Google domain’s DNS doesn’t have API access and hence changes cannot be made via any automation tool. So workaround on this, I used Certbot-DNS-Standalone. It’s smart enough to spin up an authoritative DNS server to listen for DNS queries on port 53 specific to a hostname TXT for ACME DNS validation.
So while looking at #2 I also found challenges with Nginx reverse proxy configurations. I tried finding possible Ansible roles but had one or other issue with each one I tried. Official Nginx role for Ansible is pretty extensive but misses Certbot. Plus to be true it’s way more extensive and somewhat not so fun in use with so many variables. This one is easy to use, fewer variables but supports only either no-SSL or Certbot SSL with HTTP challenge only. One cannot define a custom certificate on this one.
So after a few hours of trying various options, I ended up in putting a setup. It uses a bunch of tools (most of them I was using anyway for other things).
-
Ansible to generate and push SSL certificate from a server with access to authoritative DNS traffic for that zone.
-
Gitlab (or any Git hosting as such) to keep the Ansible playbooks
-
Ansible AWX to execute, schedule, alert etc for the certificate generation as well as deployment.
Here’s how it all works
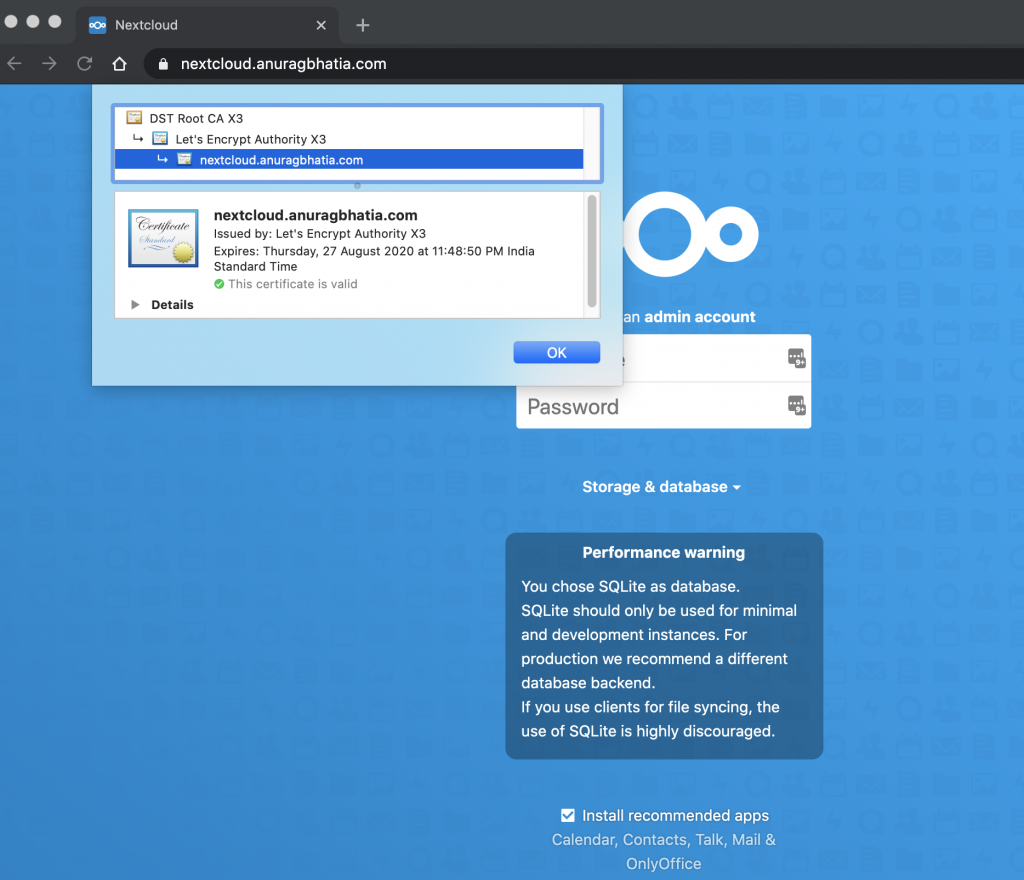
Say I want to have a Nextcloud instance hosted privately (on private IPs) with SSL
Step1: Get it going (can be via Docker or just any form of install)
Image pull from Dockerhub:
anurag@docker:~$ docker pull nextcloud
Using default tag: latest
latest: Pulling from library/nextcloud
Digest: sha256:b1bf8942e85c76aa86362a9ec7eef7ac12ac3c0f3106dd6a0ee89871186dff73
Status: Image is up to date for nextcloud:latest
docker.io/library/nextcloud:latest
anurag@docker:~$
Next, spin up Docker container:
anurag@docker:~$ docker run -d -p 8080:80 nextcloud
f28de86b03290dd656566bf2b2a6441f18f717be42cfc6f96f52afed3945263e
anurag@docker:~$
This makes it live. In this specific case it’s running on 172.17.0.7 port 80.
Step 2: Make changes in DNS
Let’s say I want to use “nextcloud.anuragbhatia.com” as hostname, so for DNS validation, I would need: _acme-challenge.nextcloud.anuragbhatia.com to reply with the required TXT record.

Here it’s pointing to nextcloud.anuragbhatia.com.ssl.anuragbhatia.com. where “ssl.anuragbhatia.com” is special sub-zone delegated to my server. This gives me a way to only host this specific script and not the parent zone DNS with myself. ssl.anuragbhatia.com has an NS record to server7.anuragbhatia.com and server7.anuragbhatia.com has an A record which takes the query to the container. All this is set up once and all once needs per new hostname/application is a CNAME record as shown in the screenshot above.
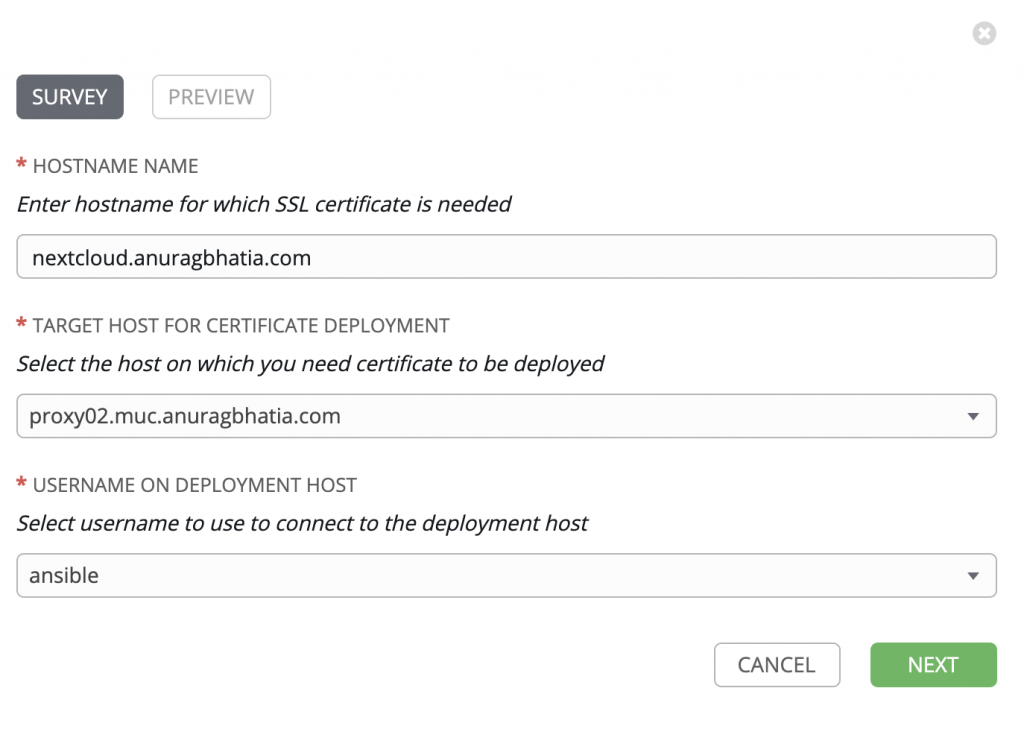
Step 3: Generate SSL cert via Ansible playbook called via Ansible AWX
I wrote this playbook where I would pass arguments during run time via Ansible AWX (open source version of the Ansible Tower). The variables in the playbook are:
-
ssl_domain - Private domain/hostname for which SSL cert is needed
-
certbot_email - Email needed for certbot for things like renewal. Though because my setup is automated, there’s not much point of mails.
-
deploy_host - This is the host where we want to deploy the SSL certificate. Can be any server or device running SSH and Ansible should have SSH based access to this device. In my case it’s a server running NGINX reverse proxy
-
deploy_host_user - That’s used for rsync for pushing certificate & keys. I have a special user for Ansible for most of my nodes.
I provide these during run on the fly via survey. So screen appears as:
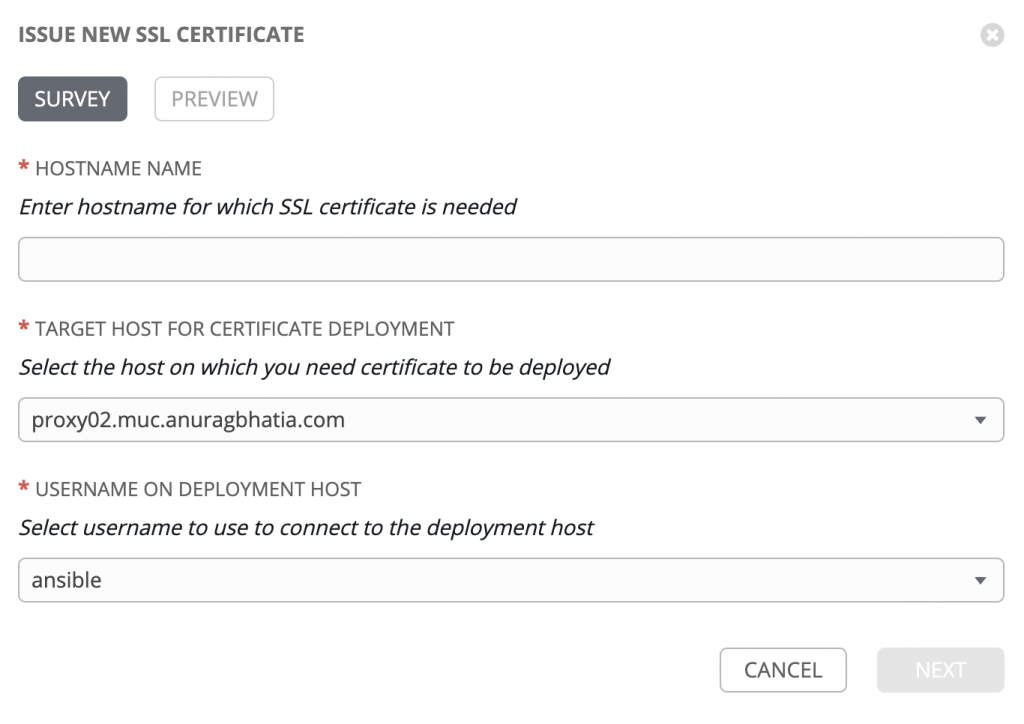
And with that, I launch the playbook. It generates and deploys the SSL certificate on the required host. On transport, it uses rsync + routed IPs over VPN to add an extra layer of security.

An alternate to this system can be prompts in Ansible so that one can keep on using it with command line without need of having AWX though it will have issue with step 5!
Step 4: Generate the required reverse proxy configuration
Just like for last one, I have put this playbook which needs some information via a variable and based on that it generates the reverse proxy configuration.
Variables used:
- Domain
- Backend IP - IP address of the machine hosting the application
- Backend port - Port for which we want NGINX to do the reverse proxy
- SSL - “yes” or “no” depending on whether SSL is needed to be deployed
Just like step3: I have Ansible AWX configured to ask for these variables during run time.
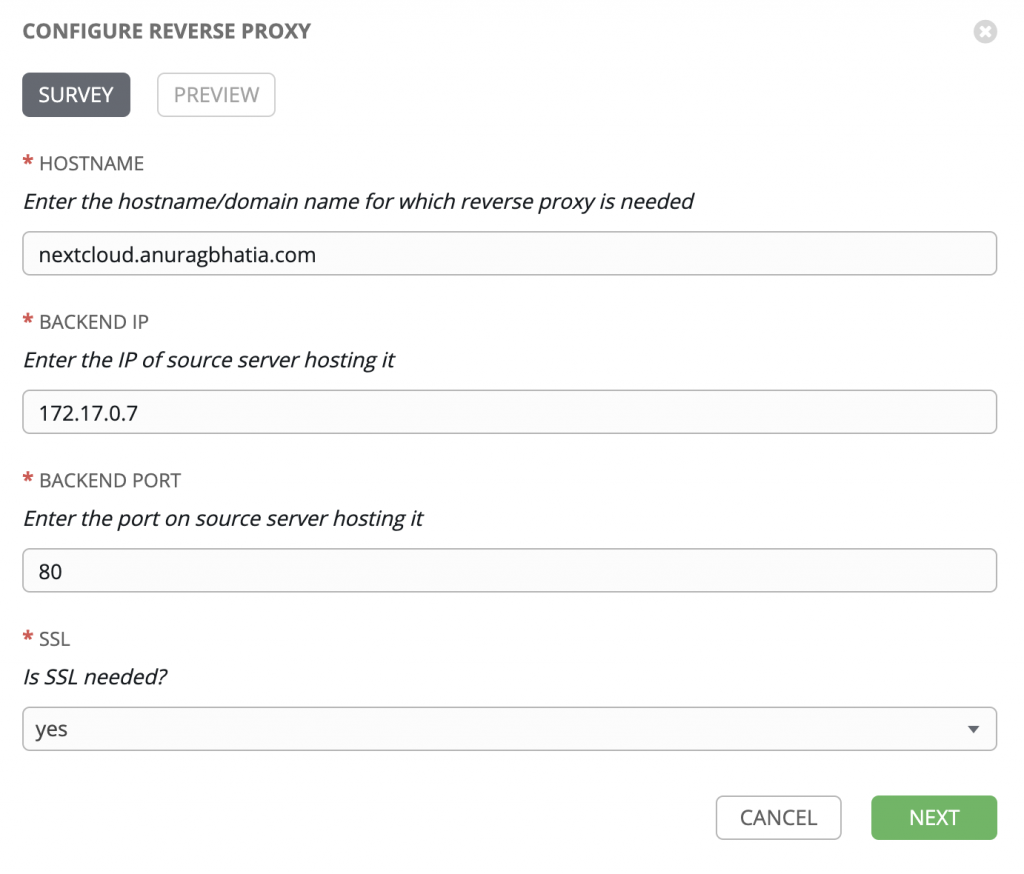
And there it goes live!
Step 5: Setup automatic SSL certificate renewals
Since Letsencrypt certificates expire in 90 days, it’s important to have automated renewals. For this again I use Ansible AWX instead of cron jobs. Cron jobs usually are painful when they fail and at times are too picky with environment variables.
So I setup a schedule within the same task with pre-defined variables.
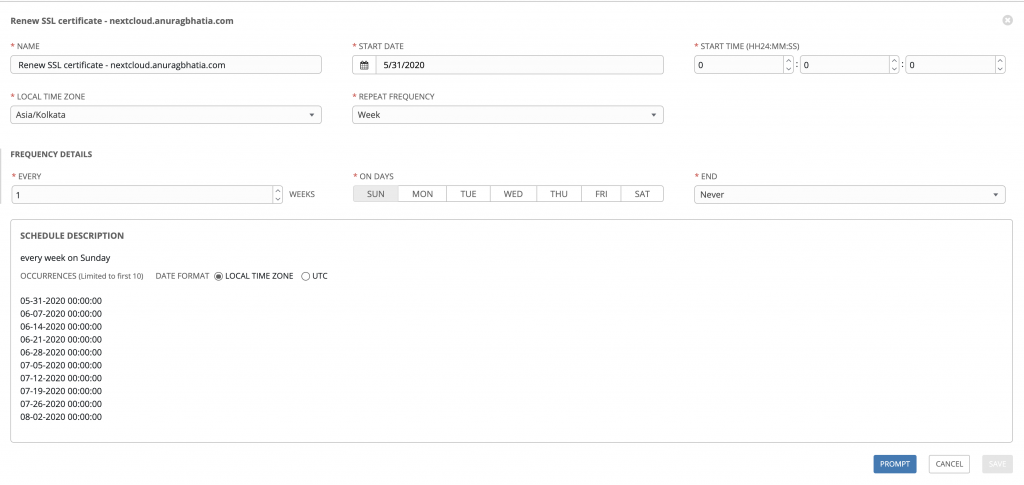
Next, I can put pre-defined run time variable values by clicking prompt.
Once saved, this will run this playbook every week. More logical might be 30 days though. And it also gives me option to notify via email, Slack or any similar channel if this playbook fails during running.

Interested in using these playbooks?
Here’s the Github link: https://github.com/anuragbhatia/Ansible-NGINX-Certbot
Misc notes
I might be tweaking following in this setup to avoid having key/cert pair leave the server running script to NGINX proxy server. Ideally private key should stay on the proxy server and never leave it. Need to see if I can make Certbot DNS standalone plugin to work with that. Another option can be to have the entire setup with an option to use a self-signed certificate which Ansible pushes across all machines for trust. Extra work, but saves one from exposing hostnames of all private containers in SSL transparency reports.
Don’t want to run Ansible, self-hosted containers and more but still want to host these fun projects? Check out my brother’s blog post on How to deploy side projects as web services for free.