Self hosted open source mesh VPN with IPv6 support!
A rather long title but the post is about self-hosted open-source mesh VPN with IPv6 support and works with nodes behind CGNAT!
This will be a long post documenting the concept of mesh VPN, the problem it is solving as well as a working demo. If you are not planning to deploy it right away, you can skip the post after the “Configs and setup” section.
Problem
I am running a site-to-site VPN for a long time between various servers located far away from each other. Originally these used to be on OpenVPN and later I moved to wireguard. These were not mesh but rather in a linear topology. I would have a home node here in Rohtak connected to two different servers in Mumbai over two different ISPs (via policy-based routing), those two Mumbai nodes would maintain the site-to-site VPNs with a few servers in Europe & those servers further connect to a few servers in the US. This setup ensured private network connectivity with encryption so that I can have GitLab runners spread around based on available CPU load and those runners would speak to database/storage servers securely without having to deal with encryption on per project/app basis. This also gave me basic features like running cameras are home which feeds into the Frigate instance in Mumbai for motion detection-based recording, monitoring these cameras & other device uptime using the uptime-kuma instance in Ashburn etc.
While this setup works, it has a few issues:
- It’s extremely complicated to setup and maintain.
- I wanted easy dynamic routing and hence I ran wireguard with the “table = off” command & simply ran routing on top of it with OSPF + iBGP + route reflectors with FRR.
- Most of this network is stable except the most critical part i.e my home office where I sit. Fibre cut can bring down a link (as these are retail GPON connections with no path protection) and hence dynamic protocols had to support link switchover.
- I had Gitlab CI jobs to tweak OSPF cost on the virtual circuits based on traffic for the month. My primary ISP irritatingly still caps at 1TB/month (though they reset the cap on request I cannot pump 500-600GB worth of data over it without looking at the cap) while my secondary ISP Siti has no caps but lower speeds (to keep cost low).
- All this network was completely IPv6 between all servers except my home. Both my ISP lag on the IPv6 front & hence I have to put fallback support for IPv4. This adds firewall management more complex.
- I can access the storage server at home over IAXN (primary ISP) because it has public IP but not over Siti broadband (secondary ISP) because that is behind CGNAT. If I am travelling & need to pull data from home, it would go as Rohtak -> s01.bom / s02.bom -»> me. This was ineffective performance wise.
Thus I started exploring the mesh VPN concept. There are a few commercial offerings like tailscale, zerotier etc and they offer a wonderful way to set up, manage and maintain VPN. They pretty much solve all these problems except that I cannot use any of them because they have controllers sitting outside of my control & if that controller is compromised, that would compromise my network. I explored tricks like using Ansible as well as custom python script (checkout wireguard-meshconf).
Both of these setups have a few fundamental design issues:
- One cannot run a mesh VPN without NAT traversal. They can work for nodes with public IPs but communication from a client behind NAT to other clients behind NAT will just fail to give a broken blackholing effect.
- Wireguard can run on the same port on all devices giving a “mesh-like effect”. Say s01, s02, and s03 are all running mesh VPNs between each other on say port 9999. But here “table=off” cannot be used because if that is used, wireguard won’t know where to send which packets. It expects more explicit values in “AllowedIPs” instead of 0.0.0.0/0, ::/0. If I use wireguard without table=off, then routing is static and I cannot rely on it because I need the home private block to be dynamically available over both VPNs spread over two ISPs at home.
- Further more above issues makes it impossible to use a mix of IPv4 and IPv6. If I have some IPs in IPv6 based tunnel, the same cannot be used in IPv4 based tunnel. I need IPv4 fallback for the home network as well as networks during my travel. And if I use IPv4 only it solves this problem but IPv4 only in itself is a sub-standard poor solution. #1 remains unsolved even with IPv4 only tunnels.
Due to these issues, I often tested and never ended up using a mesh VPN for a long enough time. If nodes config, endpoint, and routing table have to be customised, it becomes complicated quite quickly.
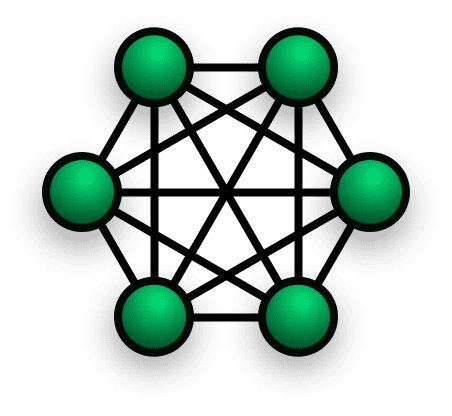
The formula for mesh VPN tunnels is the same as that of iBGP mesh. The number of tunnels = n * (n-1) / 2. Thus for 10 nodes, one is looking at (10 * 9)/2 = 45 tunnels which becomes a task in itself to manage. One can run mesh VPN without static routing & “table=off” parameter but then each tunnel has to use a different port further adding to the firewall fun.
After a recent outage and issues in accessing my servers, I looked at alternate options more seriously. Turns out there is an excellent open-source, self-hosted solution to all these issues - Headscale. It’s open source implementation of a tailscale control server & can work with existing tailscale clients as they can be configured to speak to the self-hosted server instead of tailscale. Tailscale clients are simply wireguard on the data plane packed with a control plane which adds this smartness.
How mesh VPN works with tailscale / headscale
The idea here is that keys & VPN tunnel endpoints, and routes can be dynamically updated as all clients speak to a “control server”. This control server has to be sitting in public over a public IP (or behind a reverse proxy). All VPN nodes can next be seated on public/private/behind NAT/behind firewall ….just anything as long as outgoing UDP is not blocked.
Clients keep on updating the control server with their WAN IP & public keys and the control server shares that across. If a new client is added to this mesh network, the public key of a new client is shared across all the clients dynamically. And since endpoints can be updated on the fly, it takes care of the IPv6 aspect. It uses IPv6 wherever available and falls back on IPv4 when IPv6 is not available.
The magic of clients behind CGNAT doing peer to peer
The real advantage of this system comes to be with clients doing peer-to-peer while sitting behind CGNAT. It uses the technique of NAT traversal which has been used in many other apps in past including popular chat client - WhatsApp as well as part of WebRTC. At a conceptual level, it simply makes use of punching holes in the NAT table while coordinating those details (WAN_IP:PORT) with the control server. So take e.g I am behind double NAT on Siti broadband & my cell phone on Jio is with native IPv6 + 464XLAT & NAT 64 for IPv4 fallback. Since both sides do not have IPv6, they can only communicate over IPv4. I cannot have port forwarding enabled on either of the ISPs but I can initiate a connection and send packets out.
Since both clients (on my phone and home server) speak to the co-ordination server, they can share WAN IP and negotiate on a port to use. Now either side will send the first packet (as negotiated by the control server).
| Home Server Private/LAN IPv4 | Home ISP WAN IPv4 | Mobile private/LAN IPv4 | Mobile WAN IPv4 |
|---|---|---|---|
| 172.16.20.2 | 198.51.100.1 | 192.0.0.2 | 203.0.113.1 |
So now let’s say the home server initiates the first packet. It will go from 172.16.20.2:58000 -> 203.0.113.1:58001. As soon as the mobile player’s CGNAT gateway gets it, it will look it’s NAT table for 198.51.100.1:58000 towards 203.0.113.1:58001. It won’t find any entry (no port forwarding rules!) and will drop the packets. But the home ISP has now a “hole punched” in the NAT table. It is expecting packets back from 203.0.113.1:58001 -> 198.51.100.1:58000 and would allow these if the other side i.e mobile sends these packets. Once holes are punched for both sides, there will be full two-way communication happening. Here time becomes an important part as the second device has to reply very close to the time when first sends the packet. Thus besides syncing IPs and ports, these clients also sync on time/threshold on when to send packets. This sort of solution can work only on UDP because of the “connectionless nature” of the protocol. This page on tailscale documentation explains this in detail with nice graphics. Headscale also packs the Encrypted TCP relays (DERP) which takes care of routing via server if peer-to-peer connections are not possible.
Besides that this podcast interview with Tailscale founder Avery Pennarun covers the idea behind adding a smart control plane behind the dumb but powerful data plane of wireguard.
Configs and setup
To avoid masking details from my production config & hide details from this public blog, I am going to deploy a fresh setup with a controller running on Vultr in San Jose, a client running on Vultr Delhi, a client on phone (on Jio) & iPad (on Siti broadband behind CGNAT). I am putting the control server for this demo far away to demonstrate low latency peer-to-peer connection while the control server is at high latency. I will try to document all the configs here as documentation seems to be missing a few things.
On the controller node, I will install the docker engine because it’s easier to manage these applications via docker in the long term instead of locally installed versions. If one is not familiar with docker, there are instructions for native installation here.
The auth DNS have an entry for controller-sjc.demo.anuragbhatia.com pointing to IPv4 and IPv6 of the controller.
anurag@controller-sjc:~$ docker ps -a
CONTAINER ID   IMAGE     COMMAND   CREATED   STATUS    PORTS     NAMES
anurag@controller-sjc:~$
There is no official docker-compose.yml file but since docker run arguments are visible here, I have ported it to a simpler docker-compose.yml config for easy management.
docker-compose.yml for headscale
version: '3'
services:
  headscale:
    image: 'headscale/headscale:latest'
    ports:
      - '10.10.10.10:8080:8080'
      - '127.0.0.1:9090:9090'
    volumes:
      - config:/etc/headscale
    restart: unless-stopped
    command: headscale serve


volumes:
  config:
And with that one can bring up the container. It will likely fail in absence of config but it’s fine as it would create mapped volumes and one can add config over there. I prefer docker volumes over bind mounts as that makes backup & restore easier without messing up file permissions. Note that 10.10.10.10 is an IP on the loopback here.
anurag@controller-sjc:~/headscale$ docker-compose up -d
Creating network "headscale_default" with the default driver
Creating volume "headscale_config" with default driver
Pulling headscale (headscale/headscale:latest)...
latest: Pulling from headscale/headscale
10f855b03c8a: Pull complete
fe5ca62666f0: Pull complete
b438aade3922: Pull complete
fcb6f6d2c998: Pull complete
e8c73c638ae9: Pull complete
1e3d9b7d1452: Pull complete
4aa0ea1413d3: Pull complete
7c881f9ab25e: Pull complete
5627a970d25e: Pull complete
738ab95077bc: Pull complete
80ec95682aee: Pull complete
f51c8fa85103: Pull complete
f91509ce987c: Pull complete
Digest: sha256:ed381c17270c6c688164214ffa0ec77091492433faa5134e87e372e6d4454f0e
Status: Downloaded newer image for headscale/headscale:latest
Creating headscale_headscale_1 ... done
anurag@controller-sjc:~/headscale$
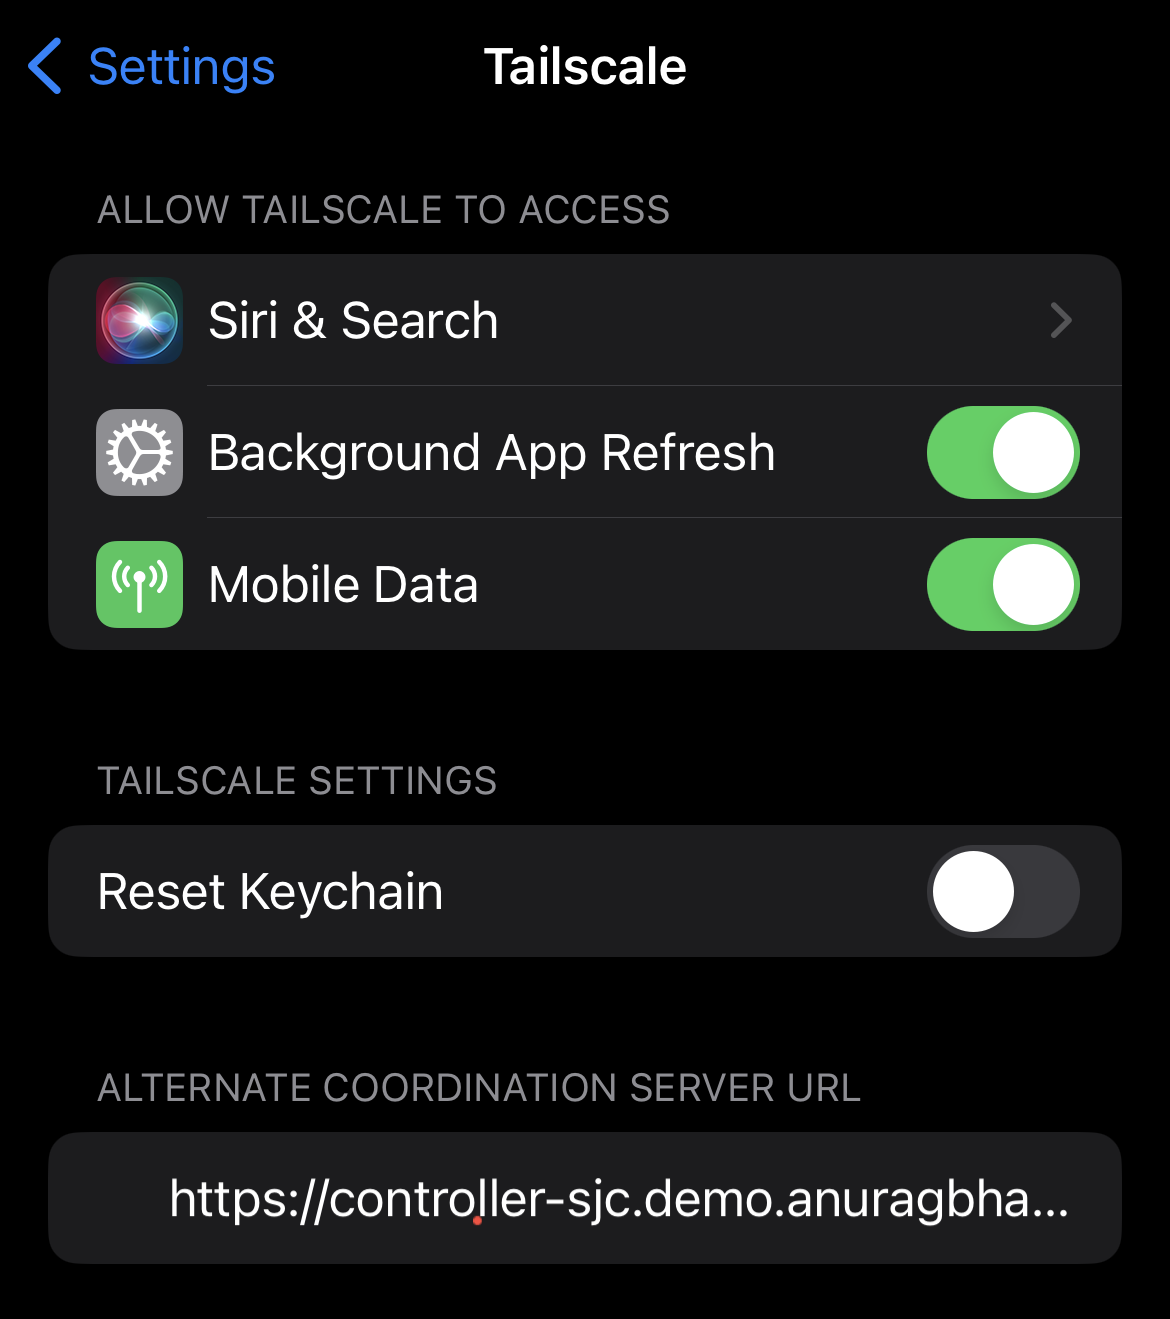
Adding config in this volume from default sample and tweaking a bit gets me a working config. I have tweaked server_url to https://controller-sjc.demo.anuragbhatia.com and listen to address to 0.0.0.0:8080 to ensure the container listens for packets coming from the host (and subsequently via a reverse proxy).
anurag@controller-sjc:~/headscale$ docker-compose restart
Restarting headscale_headscale_1 ... done
anurag@controller-sjc:~/headscale$ docker ps -a
CONTAINER ID   IMAGE                        COMMAND             CREATED         STATUS         PORTS                                                NAMES
33a93df4334a   headscale/headscale:latest   "headscale serve"   7 minutes ago   Up 3 seconds   127.0.0.1:8080->8080/tcp, 127.0.0.1:9090->9090/tcp   headscale_headscale_1
anurag@controller-sjc:~/headscale$
This brings up the headscale on loopback port 8080.
anurag@controller-sjc:~/headscale$ curl -v  http://10.10.10.10:8080
*   Trying 10.10.10.10:8080...
* Connected to 10.10.10.10 (10.10.10.10) port 8080 (#0)
> GET / HTTP/1.1
> Host: 10.10.10.10:8080
> User-Agent: curl/7.81.0
> Accept: */*
>
* Mark bundle as not supporting multiuse
< HTTP/1.1 404 Not Found
< Date: Sun, 26 Mar 2023 21:49:21 GMT
< Content-Length: 0
<
* Connection #0 to host 10.10.10.10 left intact
anurag@controller-sjc:~/headscale$
This 404 confirms web server is running and listening for the requests. Next, I will add caddy here for reverse proxy. One can use the in-built system for letsencrypt with headscale but that would restrict port 80/443 to only this app. The use of reverse proxy gives the flexibility of using other apps on the same server/IP. \
Caddyfile:
anurag@controller-sjc:~/caddy$ cat Caddyfile
https://controller-sjc.demo.anuragbhatia.com {
    reverse_proxy 10.10.10.10:8080
}
docker-compose.yml
anurag@controller-sjc:~/caddy$ cat docker-compose.yml
version: '3'
services:
  app:
    image: 'caddy:latest'
    restart: unless-stopped
    ports:
      - '80:80'
      - '443:443'
    volumes:
      - /home/anurag/caddy/Caddyfile:/etc/caddy/Caddyfile
      - data:/data
      - config:/config

volumes:
  data:
  config:
Bringing up the container…
anurag@controller-sjc:~/caddy$ docker-compose up -d
Creating network "caddy_default" with the default driver
Creating volume "caddy_data" with default driver
Creating volume "caddy_config" with default driver
Pulling app (caddy:latest)...
latest: Pulling from library/caddy
ef5531b6e74e: Pull complete
27e3e797818b: Pull complete
5cebb4c80b39: Pull complete
90648ba22c19: Pull complete
Digest: sha256:20bbfcf569bdcbca76a8df356877600d12331fef823c3e6ad6faa192d5668304
Status: Downloaded newer image for caddy:latest
Creating caddy_app_1 ... done
anurag@controller-sjc:~/caddy$
That’s all that is needed on the control server as a bare minimum to work.
Next, let’s install the tailscale client as per these instructions on the server in Delhi.
anurag@client-del:~$ sudo tailscale up --login-server=https://controller-sjc.demo.anuragbhatia.com
[sudo] password for anurag:

To authenticate, visit:

  https://controller-sjc.demo.anuragbhatia.com/register/nodekey:9c5eabf5ae5059e18ddd29caf407a6db9fd5bd873f4752121bb8aa36189a6c4b
Note: I am not hiding nodekey or other sensitive material from this blog post because this setup is specifically for this post and demo nodes will be torn down before this post is published. Now, this URL clicking works in tailscale’s version but in a self-hosted one with headscale, there is no web UI to approve it. One can simply add a user/namespace and add these nodes there.
On the controller node:
anurag@controller-sjc:~/caddy$ docker exec headscale_headscale_1 \
> headscale users create anurag-demo-network
User created

anurag@controller-sjc:~/caddy$ docker exec headscale_headscale_1 \
> headscale --user anurag-demo-network nodes register --key nodekey:9c5eabf5ae5059e18ddd29caf407a6db9fd5bd873f4752121bb8aa36189a6c4b
Machine client-del registered
anurag@controller-sjc:~/caddy$
and back on the Delhi client node I get:
anurag@client-del:~$ sudo tailscale up --login-server=https://controller-sjc.demo.anuragbhatia.com
[sudo] password for anurag:

To authenticate, visit:

  https://controller-sjc.demo.anuragbhatia.com/register/nodekey:9c5eabf5ae5059e18ddd29caf407a6db9fd5bd873f4752121bb8aa36189a6c4b

Success.
anurag@client-del:~$
This confirms that the node is now part of the network (and is the only node in the network for now).
anurag@controller-sjc:~/caddy$ docker exec headscale_headscale_1 headscale --user anurag-demo-network nodes show
ID | Hostname   | Name       | MachineKey | NodeKey | User                | IP addresses                  | Ephemeral | Last seen           | Expiration          | Online | Expired
1  | client-del | client-del | [FKPFi]    | [nF6r9] | anurag-demo-network | 100.64.0.1, fd7a:115c:a1e0::1 | false     | 2023-03-26 22:16:05 | 0001-01-01 00:00:00 | online | no
anurag@controller-sjc:~/caddy$
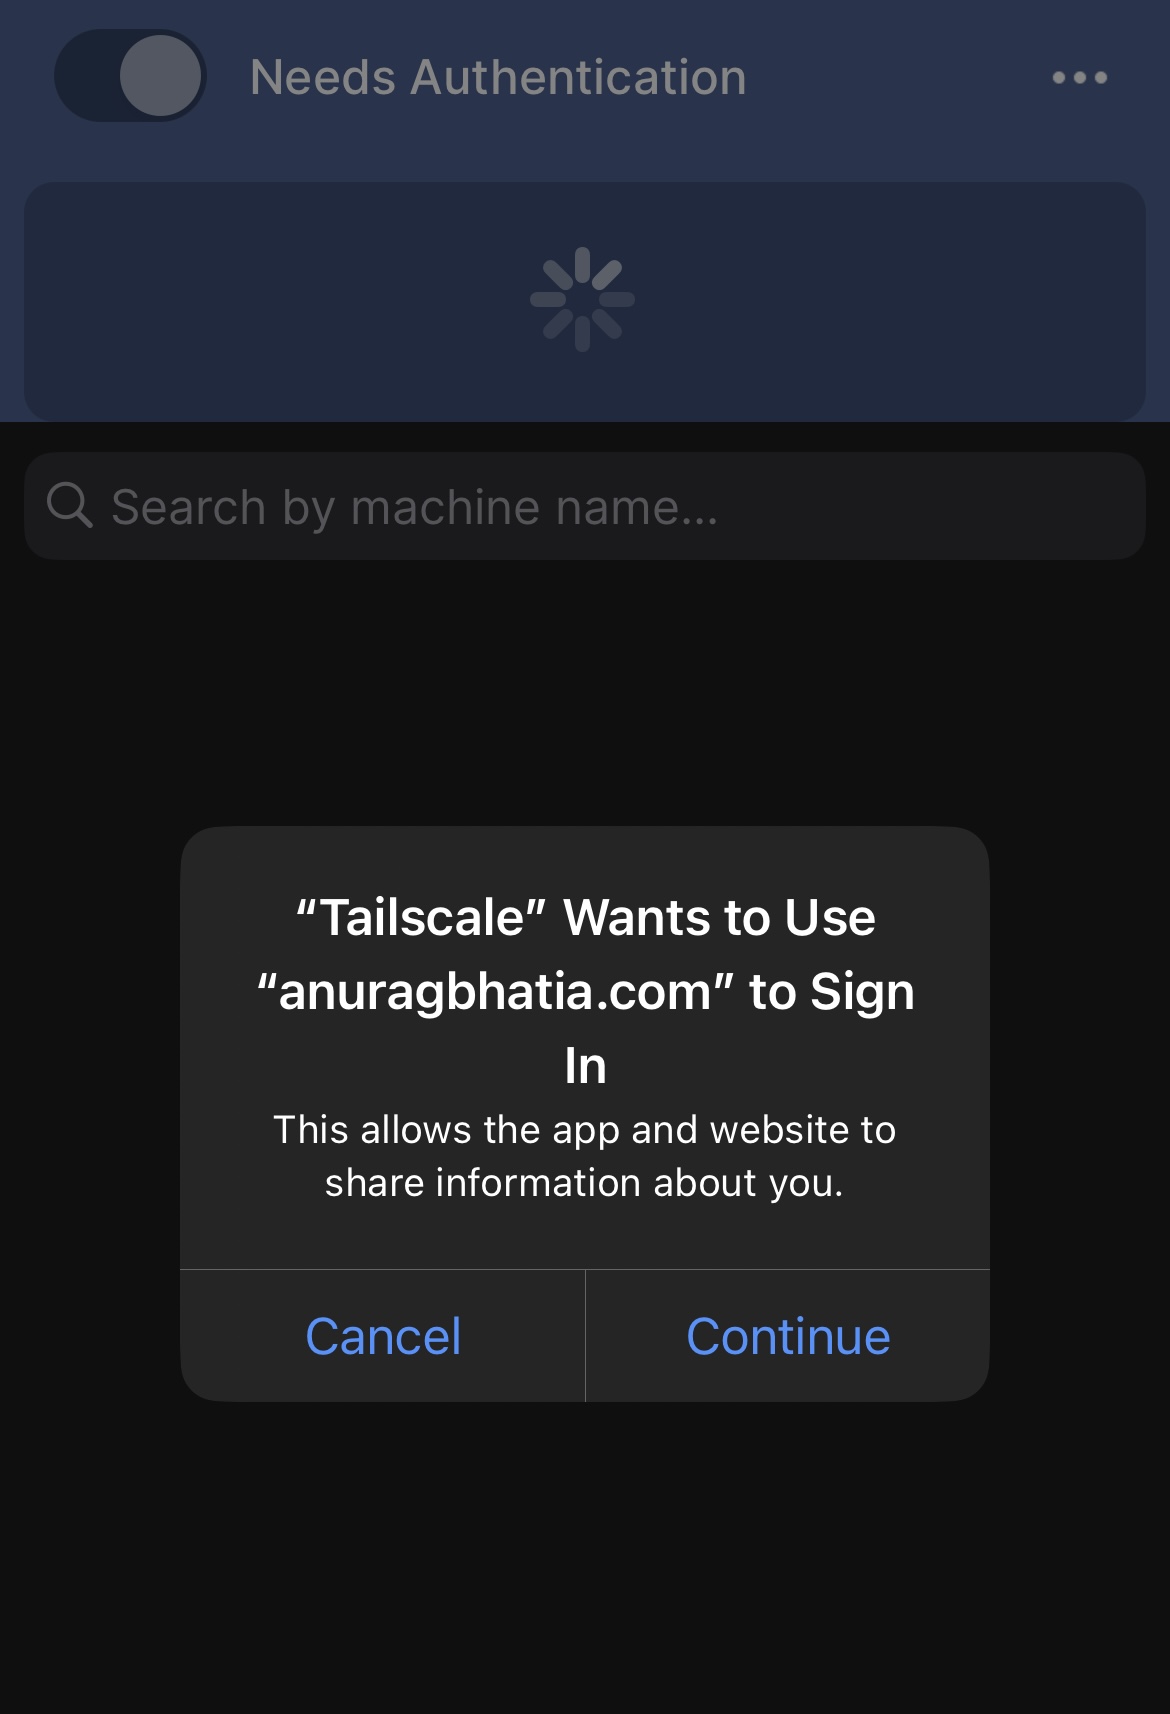
Next, let’s add my phone and iPad to the same network. For iOS one can use the official tailscale client and edit the controller server in the settings.

anurag@controller-sjc:~/caddy$ docker exec headscale_headscale_1 headscale --user anurag-demo-network nodes register --key nodekey:b9ec553a2c09aff7efb5947f67ea2b32f3ef92976e83ab675eb5545ae6416557
Machine anurag-mobile registered
anurag@controller-sjc:~/caddy$
Note: One can get nodekey from server logs as well to save time from copying that from the client but be careful about which key you approve. Copying from longs can result in accidental approval of an attacker’s key who is just probing this public server.
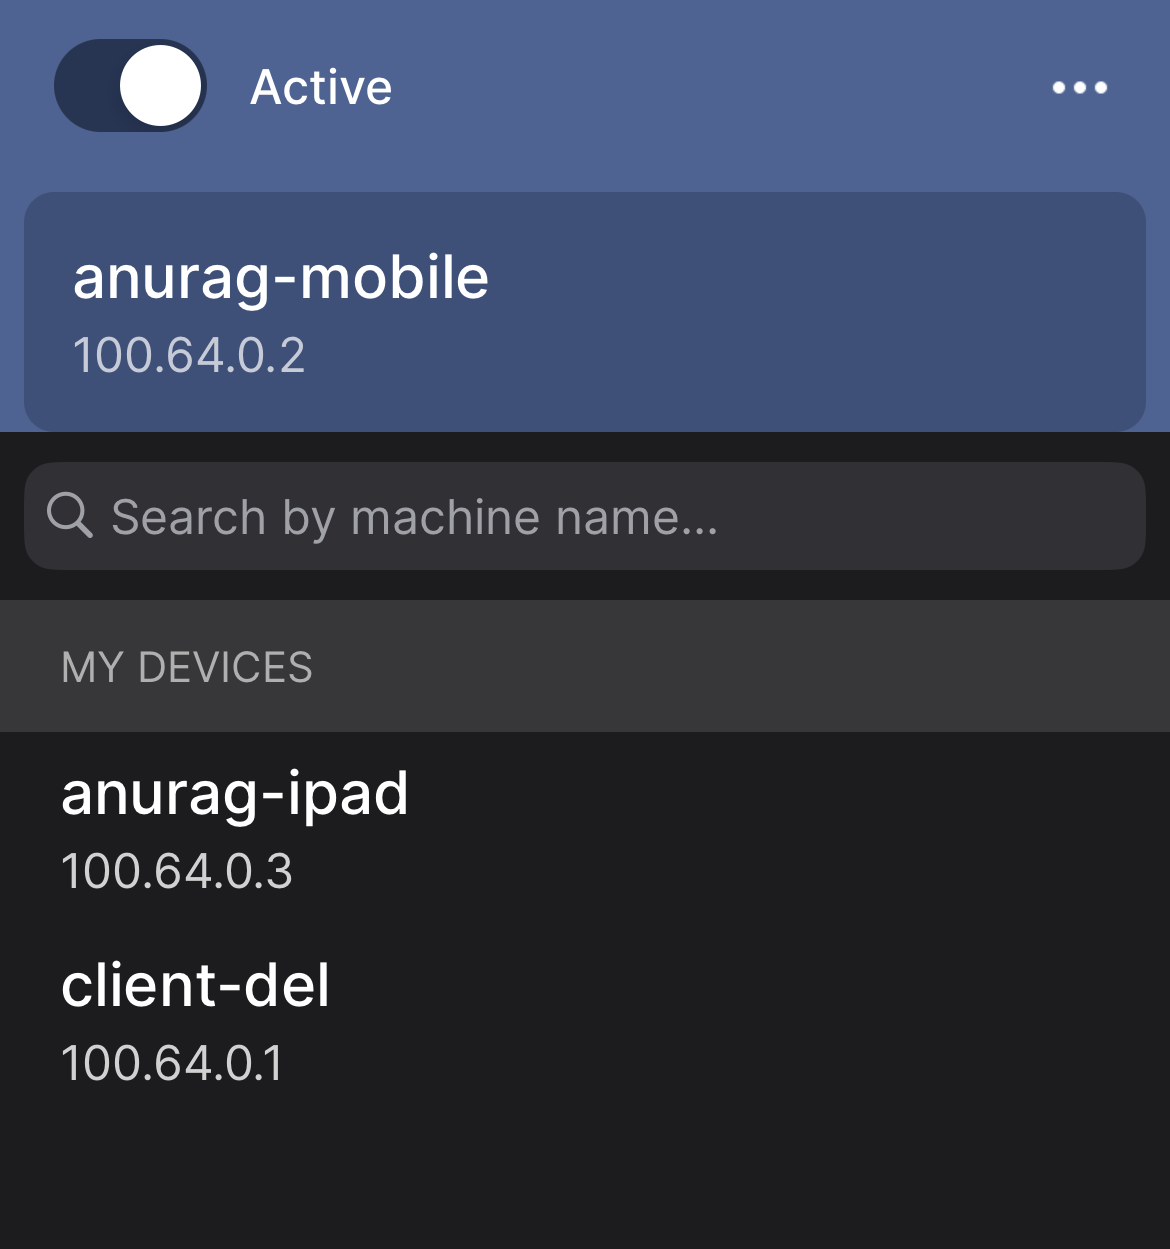
Next, with the same logic I add my iPad to this mesh as well. The process is the same as it is also an iOS device. So now I have three devices in this mesh. 3 devices i.e 3 direct VPN tunnels.
| Device | IPv4 | IPv6 | ISP | CG NAT |
|---|---|---|---|---|
| client-del | Yes | Yes | Vultr - Delhi | No |
| My phone | Yes | Yes | Jio LTE/5G | Yes on IPv4 |
| My iPad | Yes | No | Siti broadband | Yes |
anurag@controller-sjc:~$ docker exec headscale_headscale_1 headscale nodes show
ID | Hostname      | Name          | MachineKey | NodeKey | User                | IP addresses                  | Ephemeral | Last seen           | Expiration          | Online | Expired
1  | client-del    | client-del    | [FKPFi]    | [nF6r9] | anurag-demo-network | 100.64.0.1, fd7a:115c:a1e0::1 | false     | 2023-03-26 22:38:05 | 0001-01-01 00:00:00 | online | no
2  | anurag-mobile | anurag-mobile | [6gq53]    | [uexVO] | anurag-demo-network | 100.64.0.2, fd7a:115c:a1e0::2 | false     | 2023-03-26 22:38:04 | 0001-01-01 00:00:00 | online | no
3  | anurag-iPad   | anurag-ipad   | [uIgsN]    | [LW9Do] | anurag-demo-network | 100.64.0.3, fd7a:115c:a1e0::3 | false     | 2023-03-26 22:38:14 | 0001-01-01 00:00:00 | online | no
anurag@controller-sjc:~$
Ping from Vultr Delhi -> Phone on Jio:
anurag@client-del:~$ ping -c 5 100.64.0.2
PING 100.64.0.2 (100.64.0.2) 56(84) bytes of data.
64 bytes from 100.64.0.2: icmp_seq=1 ttl=64 time=86.5 ms
64 bytes from 100.64.0.2: icmp_seq=2 ttl=64 time=170 ms
64 bytes from 100.64.0.2: icmp_seq=3 ttl=64 time=118 ms
64 bytes from 100.64.0.2: icmp_seq=4 ttl=64 time=96.0 ms
64 bytes from 100.64.0.2: icmp_seq=5 ttl=64 time=355 ms

--- 100.64.0.2 ping statistics ---
5 packets transmitted, 5 received, 0% packet loss, time 4007ms
rtt min/avg/max/mdev = 86.516/165.019/354.757/99.163 ms
anurag@client-del:~$
Latency varies as one would expect on the wireless network.
anurag@client-del:~$ sudo tailscale status
100.64.0.1      client-del           anurag-demo-network linux   -
100.64.0.3      anurag-ipad          anurag-demo-network iOS     active; direct 45.249.86.152:52622, tx 7600 rx 2804
100.64.0.2      anurag-mobile        anurag-demo-network iOS     active; direct [2409:40d6:13:a680:c0a:6ed7:d06b:df1b]:41641, tx 4848 rx 4088
anurag@client-del:~$
This confirms it’s over IPv6 natively with the phone on LTE/5G while over IPv4 with Siti’s CGNAT gateway (45.249.86.152).
anurag@client-del:~$ ping 100.64.0.3
PING 100.64.0.3 (100.64.0.3) 56(84) bytes of data.
64 bytes from 100.64.0.3: icmp_seq=1 ttl=64 time=12.5 ms
64 bytes from 100.64.0.3: icmp_seq=2 ttl=64 time=11.8 ms
64 bytes from 100.64.0.3: icmp_seq=3 ttl=64 time=11.9 ms
64 bytes from 100.64.0.3: icmp_seq=4 ttl=64 time=11.8 ms
64 bytes from 100.64.0.3: icmp_seq=5 ttl=64 time=11.7 ms
^C
--- 100.64.0.3 ping statistics ---
5 packets transmitted, 5 received, 0% packet loss, time 4006ms
rtt min/avg/max/mdev = 11.706/11.925/12.497/0.290 ms
anurag@client-del:~$
And here goes the final test between phone and iPad - both behind IPv4 CGNAT.

Notice the jump in latency due to wireless at one end, plus the fact that iOS devices are not that great ICMP endpoints. Apple does various optimisations on wifi to save on to the battery. Next, when I move the phone on to the wifi network, it registers this change on the controller and the key is shared again.
anurag@client-del:~$ sudo tailscale status
100.64.0.1      client-del           anurag-demo-network linux   -
100.64.0.3      anurag-ipad          anurag-demo-network iOS     active; direct 45.249.86.152:52622, tx 14280 rx 8796
100.64.0.2      anurag-mobile        anurag-demo-network iOS     active; direct 45.249.86.152:53110, tx 6420 rx 4936
anurag@client-del:~$
Now both devices are behind the same CGNAT WAN IP as one would expect.
There are some good features built-in like sharing of specific routes or just default routes for exit.
E.g to route 10.10.10.11/32 via client-del, I can add:
anurag@client-del:~$ sudo tailscale up --login-server=https://controller-sjc.demo.anuragbhatia.com --advertise-routes=10.10.10.11/32
Warning: IP forwarding is disabled, subnet routing/exit nodes will not work.
See https://tailscale.com/s/ip-forwarding
anurag@client-del:~$
This will trigger this request on the controller which can be accepted and as soon as it’s accepted, the route will be propagated across the mesh.
anurag@controller-sjc:~$ docker exec headscale_headscale_1 headscale routes list
ID | Machine    | Prefix         | Advertised | Enabled | Primary
1  | client-del | 10.10.10.11/32 | true       | false   | false

anurag@controller-sjc:~$ docker exec headscale_headscale_1 headscale routes enable -r 1

anurag@controller-sjc:~$ docker exec headscale_headscale_1 headscale routes list
ID | Machine    | Prefix         | Advertised | Enabled | Primary
1  | client-del | 10.10.10.11/32 | true       | true    | true
anurag@controller-sjc:~$
Misc Notes:
- Project is making use of DERP TCP relays of tailscale. If needed, one can completely skip those and enable the DERP server on port 3478 and setting enabled: true under the derp section in the config.
- When using a tailscale client as a node to go out, IPv4/IPv6 forwarding should be enabled.
- The controller node does not need to be highly available as the founder explains in the podcast. Once keys and endpoints are exchanged, an outage on the controller node will not impact the exchange of p2p traffic though I see a fair amount of hits on the controller node on clients behind ugly CGNATs.
- Except for the controller, none of the clients are expected to have any port opening as connections are initiated with the outside world.
- Headscale is not an official tailscale project but is supported by them. They even hired one of the developers & he seems to be acting as a bridge between the official tailscale project and open source project.
- There is no web UI in headscale however lists an external project called headscale-webui for that. The project seems in the early alpha stage and I tested it but decided not to use it for now. A couple of commands per node addition seems fine via the command line for now.
Enjoy self-hosting! :-)